An Introduction to Displaying Web Pages
The purpose of this article is to introduce one of the popular ways of displaying data - web pages. We will build a very simple one to get started, and also get a basic understanding of how to use some of the tools installed in the prior chapter.
Web Page Makeup
Most fully fledged websites that you see are displayed through several types of code - HTML (Hypertext Markup Language), CSS (Cascading Style Sheets), and JavaScript. Some sites choose not to make use of the JavaScript portion, though that is fairly rare as it helps with interactivity.
- HTML is the structure of the data displayed on the web, without it a browser would not be able to display or load the other parts.
- CSS is the makeup of the web, without it every site would look very similar.
- JavaScript is the gearing of the web, allowing users to have fully interactive experiences.
Quick Note - General Programming
Many programming languages and environments have a similar way of splitting the data display portion, though it may require the JavaScript equivalent to load the other equivalents.
Create a Web Page
Creating Our Project
While we are just starting our first project, we still will want to make sure that we do not lose any work nor the history of that work. Since we are using GitHub, it is time to ready our first project. Please log in, and create a new project with the New button.

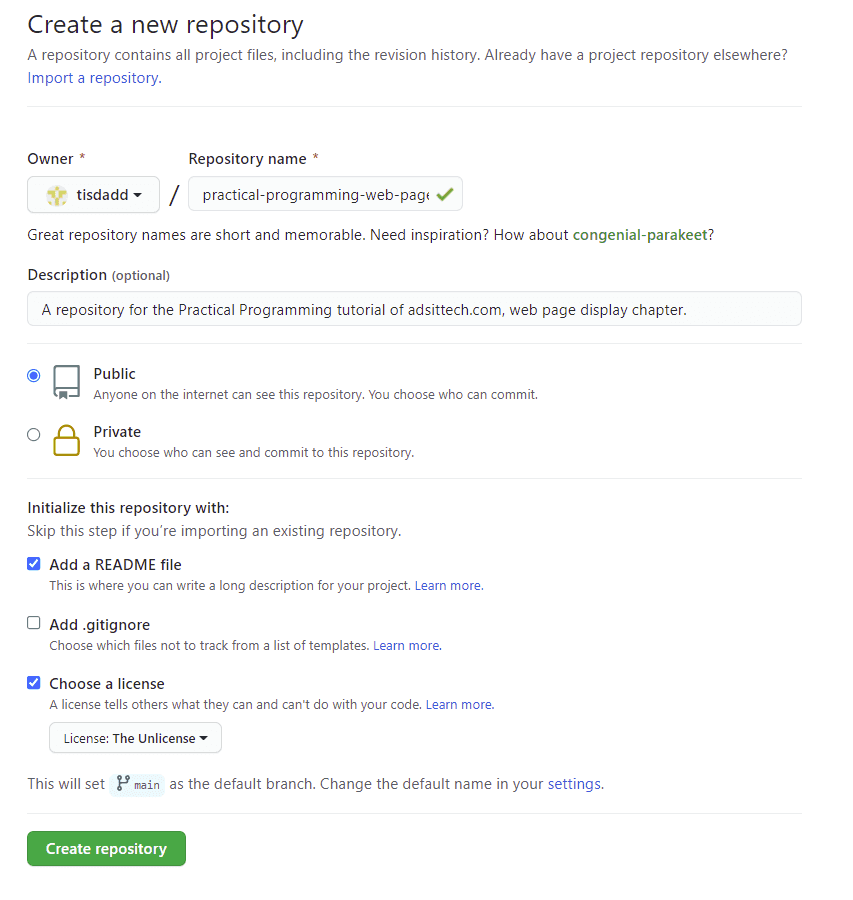
Next, give a name, and choose if you want to allow others to be able to see the repository. As this is a tutorial series, I am using the name practical-programming-web-page-display-intro. You may name it something else if you want, so long as you can easily tell what it is for. I am making everything Public so that it can be viewed and used by others (though not changed directly), but if you want to keep it to yourself you can choose Private. We will also check Add a README file so that we have something available.
Quick Note - Licensing
I am choosing a license of The Unlicense to allow others to do what they would like with it without restrictions. Most likely, you will not want this license for most things - at a later point, we will talk more about licensing. Suffice it to say, it is good to read through it before putting it in your own public repository as it tells others what the code may be used for.
I selected this one so that you do not have any legal obligations when using the code in this series. Though looking at licensing is something you will eventually have to deal with as a developer, it is something when learning that is best to not have to worry about. Here is a quick summary page for some open source licenses.
Back to GitHub
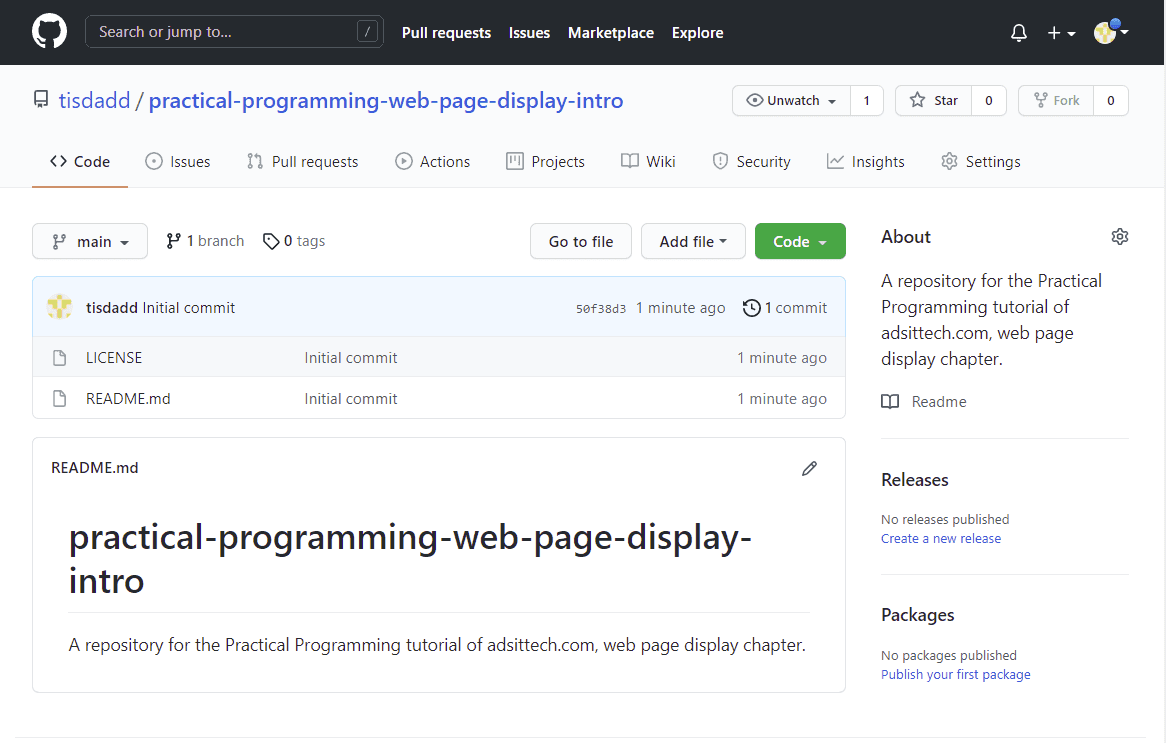
After filling out the details, click the Create respository button, and you will see a screen similar to the following.
Git the project to your computer
There are several methods to git the project to your computer. As it was requested that git be installed on the computer last time, we will use it with the command line to get started. I do the majority of my projects on the root of my hard drive under an organized workspaces folder. Figure out where you would like your projects, make sure it exists, then open Visual Studio Code to your projects folder. You can either do so by opening a folder via the right click context menu (if it was checked during installation), or through opening Visual Studio Code and selecting the menu option File->Open Folder (or the shortcut ctrl+k followed by ctrl+o) which will give you an empty page.
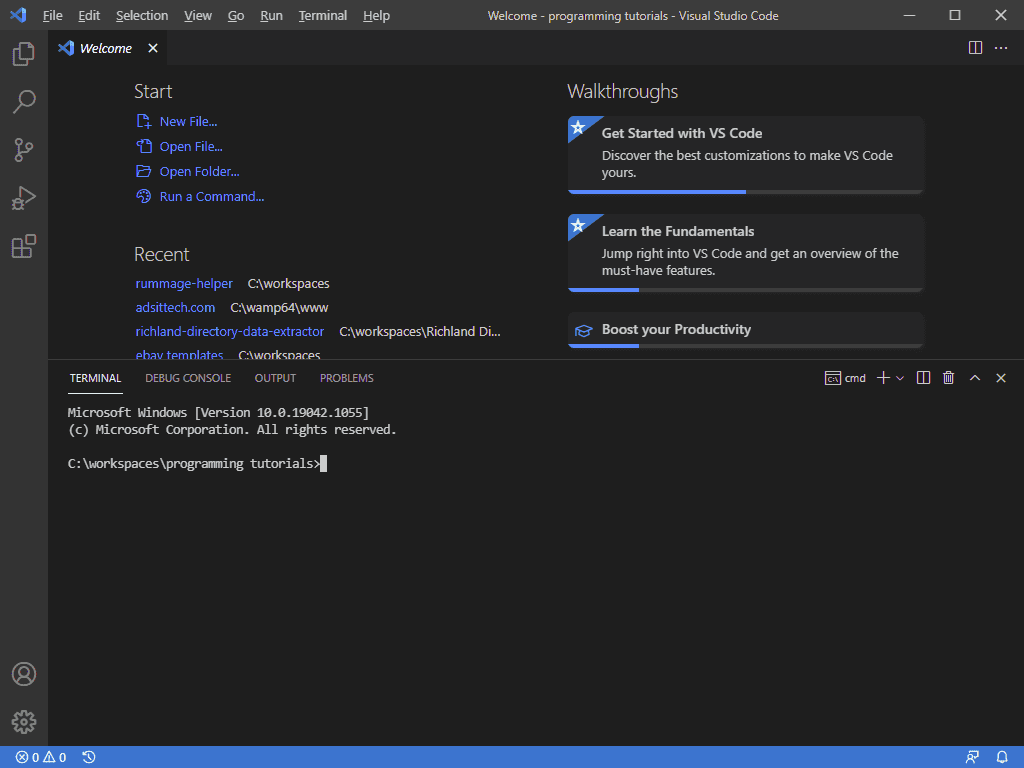
Now that we have Visual Studio Code open, we can use its integrated terminal to do our first clone. Open the terminal either using Terminal->New Terminal from the menu or ctrl+Shift+`
Your screen should look similar to the following.
Now that we have a terminal open to the location where we want our project to be, we can go back to our project page on GitHub and click the Code button. There are several options that become available, but to keep it universal we are going to copy the first thing, HTTPS Link.
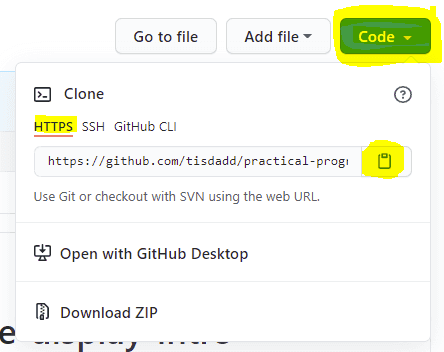
Armed with this url, we can now run the command git clone <url-here> in the terminal in Visual Studio Code.

Because this was a public repository, and anyone can download it, I did not have to log in yet. If you have made yours a private repo and are running into issues, we will be covering the login a little further down.
Now, we can make a change and see it reflected on GitHub - able to be retrieved from any computer in the future. In this case, I am going to swap the readme title by editing the README.md file text after the # symbol. Feel free to edit the README.md file if you want to, as it is for storing information. When you get changes put back to GitHub, it can be formatted differently. If something seems weird, feel free to check the Markdown Cheat Sheet to figure out why as the sheet outlines how GitHub treats .md files.
After making your changes, you may notice some things changing colors and seemingly random symbols. You may also realize that your project is in its own folder. When you cloned the project, it made a folder to stick it into, and when you edited Visual Studio Code detected that this folder is a git project, and started keeping track of changed folders.
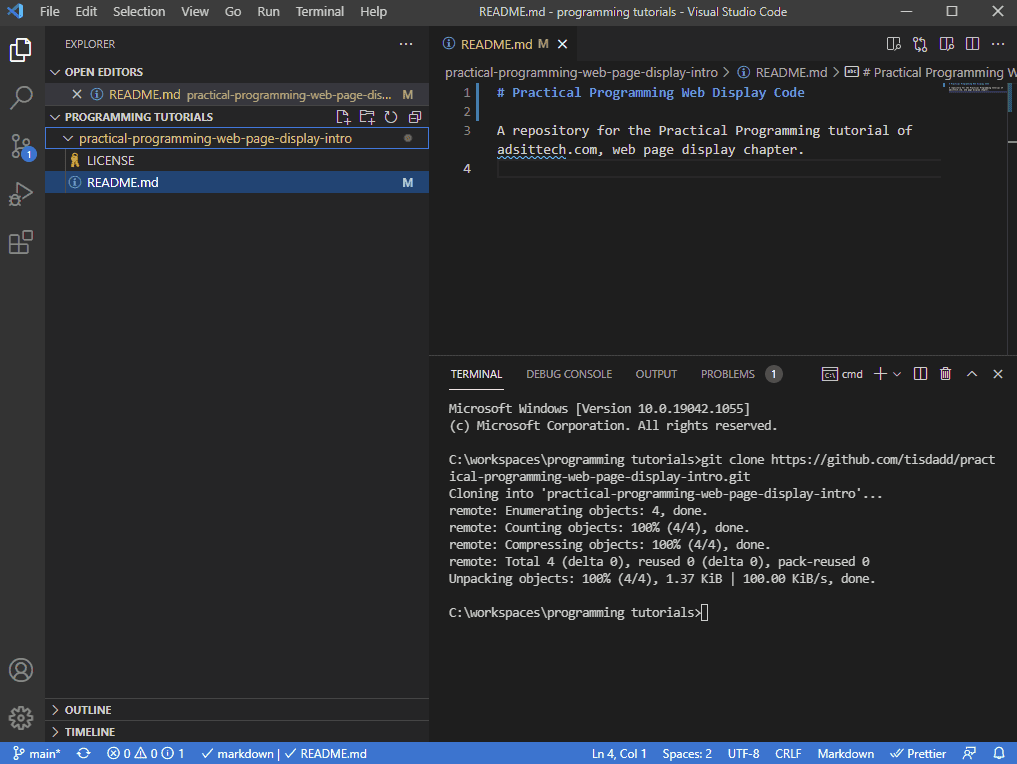
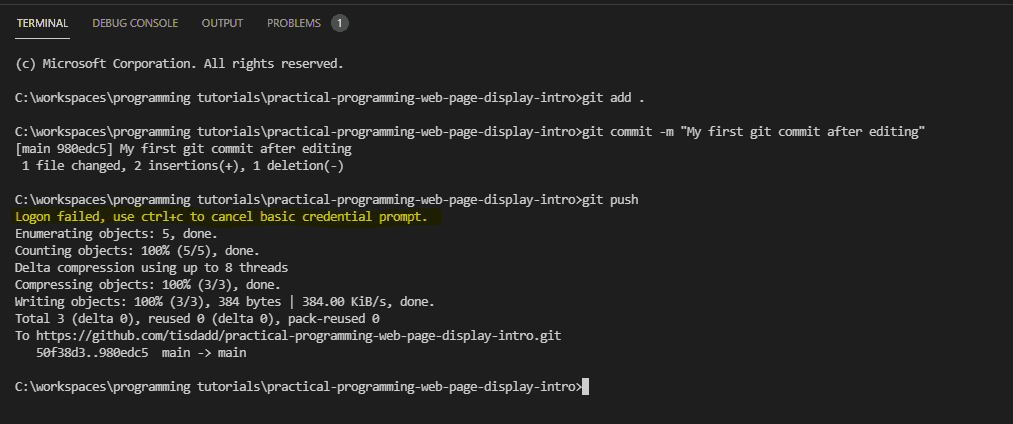
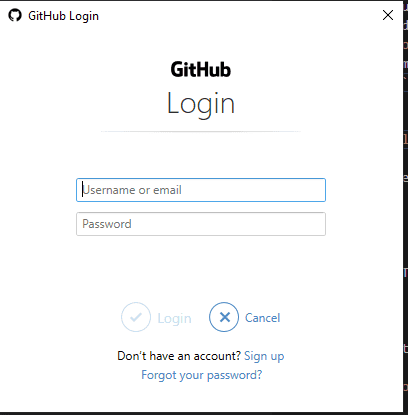
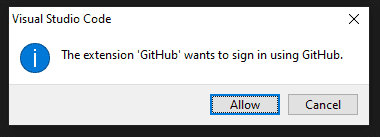
Since your project has some items changed, it would be good to open to the folder that was created. You now have two choices as to how to push your code back to GitHub. The first is to run the commands git add ., git commit -m "My first git commit after editing" and git push. If any of the steps say that you must configure your name and email, you may do so with git config --global user.name "YOUR NAME HERE" and git config --global user.email "YOUR EMAIL HERE". If you did not already run through the login requirements earlier you will see the terminal with a message as highlighted in the first screenshot below, then a login box and sequence of giving permissions in the browser and Visual Studio Code as seen below.
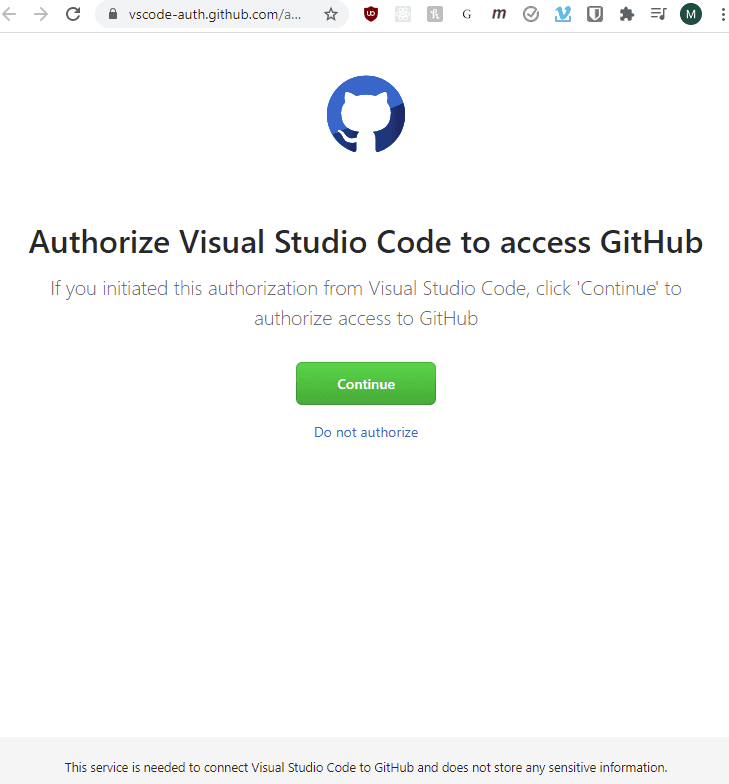
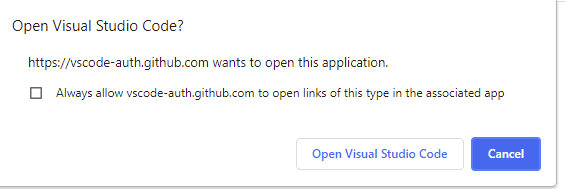
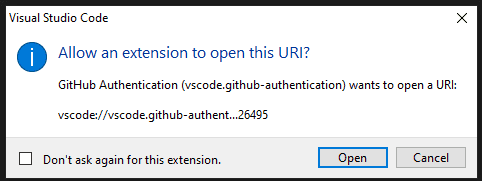
Now that we have pushed our code successfully, it is possible to see the changes right away on the github page.
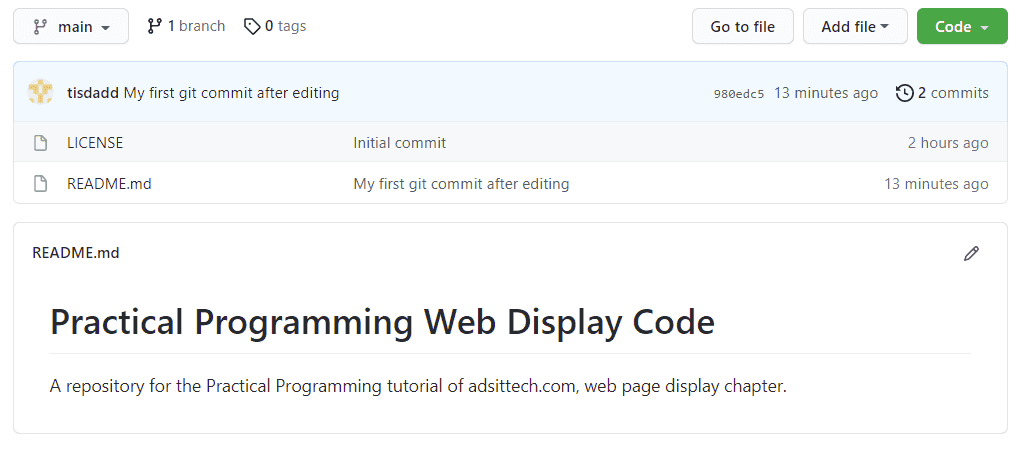
Time to do some actual code!
While it seems like a lot to get started, what we have done so far is something that must be completed when starting most projects, though not necessarily with the exact same tools. However, we can now make a new file to do some code in! You can do so by making sure that the Explorer pane is open (Double Page Icon) then clicking the New File Icon (Folded Paper with a +) or right clicking and selecting New File. Name the new file index.html as this is a common name for the entry file to any website.
In the new file, place the following.
1<!DOCTYPE html>
2<html>
3 <head>
4 <title>My first page</title>
5 </head>
6 <body>
7 <div>
8 <h1>My first Title</h1>
9 <p>My first random paragraph</p>
10 </div>
11 <div>
12 <h2>Bullet List Header</h2>
13 <ul>
14 <li>First</li>
15 <li>Second</li>
16 </ul>
17 </div>
18 </body>
19</html>
20
Now that we have this, we want to take a look at it. To do so, we will use a simple Visual Studio Code plugin called Live Server. You may also view it directly through the file system and opening in a browser, but Live Server will allow making changes and see them instantly. To use this, click the icon that looks like a stack of blocks with one falling on it (called the Extensions button when hovering - it can also be opened through Ctrl+Shift+X), then search live server and hit the Install button.

After the extension has finished installing, you may click the new Go Live button that has appeared in the lower right hand corner of Visual Studio Code.

When you click this button it should launch a new browser tab as well as changing the icon and text to show a cancel sign and what port it is live on.
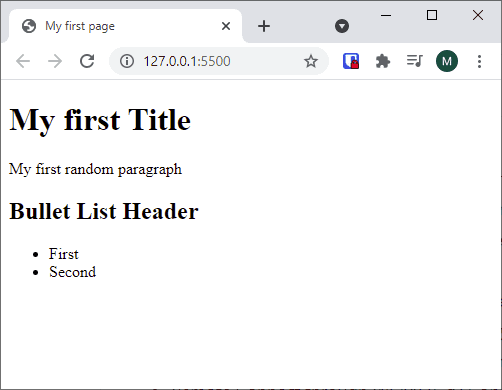

If you try changing some text in the index.html file that you made earlier, you should see it instantly change on the web page. Without using the extension, you would need to manually refresh the page.
Push Changes to GitHub
Now that we have a page to play with, we should push it to GitHub so that we don't lose it. This time, we will use the Visual Studio Code built in Source Control instead of the command line, to experience a graphical representation of the changes.
To do so, click the Source Control button on the side - it has three circles connected by a line. Then, write a message where it says Message, such as "Created Simple Index Page" and either click the check mark or hit Ctrl+Enter
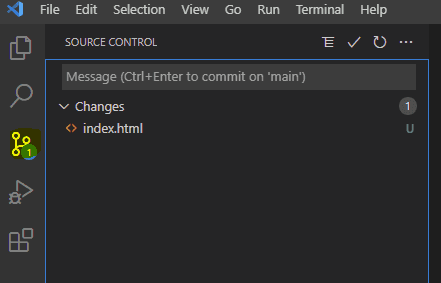
This is the equivalent of the first two git commands we typed earlier. If you were to go to GitHub and check, you will see that nothing has updated there yet, though Visual Studio Code now shows no changes.
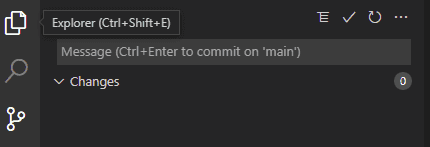
To get the changes from our computer to GitHub, we must push them. Either use the ellipsis (three dots) menu and click push or look for the syncing icon on the lower left and click it. Syncing will push and pull changes, meaning if there were changes from another computer they will be pulled in.

Explanation of index.html
Looking at the index.html file, you will notice that that aside from the text, it has a structure with indents and other text inside of angle brackets (< and >). There is another, very similar language known as XML, but HTML allows less structuring. Both are tree based languages, where there is a root element with as many children as needed for the task.
The first line <!DOCTYPE html> is there simply to tell the browser what it is parsing, in this case HTML 5. In the past, browsers were much less consistent and there were a variety of HTML standards. If you care to learn more, you may check the W3 schools page for a beginner friendly explanation, or the World Wide Web Consortium page for a more technical description.
All other lines are wrapped in a pair of tags of the form <tag_name>...content...</tag_name> with the root being the html tag. A breakdown of why this would be a tree based language and why it is called such may be seen in the below diagram.
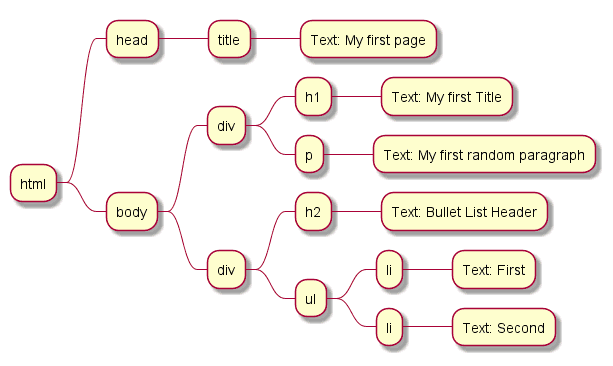
We will go over each tag in detail, in the left-to-right top down method, and what it does here.
The html tag is used to hold all of the other content on a webpage, and as such is the root.
One level into the html tag is the head tag, which is used to contain information about the page. At the moment, it only contains the title tag, which has the text "My first page". This text is what gives the label that you see on your browser tab.
After the head in the html tag, we have the body tag which is where the visible content of the page appears. We have it split into two div tags, which are used to represent a grouping of the page to keep together, and which we will be doing more with later.
The first div contains an h1 tag first, representing a main title with the text within displayed as such, larger than others on the page. Below that, we have a p tag which is used to represent a paragraph for the text given within.
In the second div, we have a smaller header with the h2 tag. The header tags go from h1 to h6, and should be used in order of importance, with 1 representing the most important heading on the page, and 6 the least important.
Next up is the ul tag, which stands for unordered list. It is used contain li tags, or list items with the text to display. As an unordered list, it appears as bullet points, if you were to change the ul tag to ol you would make it an ordered list, which uses numbers to display instead. You may place a list inside of another list if you so choose, which will make a sub-list that automatically indents one level and uses a different notation.
In fact, let us combine both to see what happens. Remember, one of the keys to practical programming is experimentation to see what happens. Many times something will work in theory, but you can not be certain of the practicality of it until trying it.
1<ul> 2 <li>First</li> 3 <li>Second</li> 4 <ol> 5 <li>Indent One</li> 6 <li>Indent Two</li> 7 </ol> 8</ul> 9
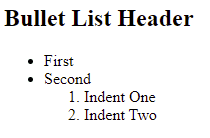
After making these changes, we should again commit our changes and push to GitHub, giving a message explaining what we have done, such as "Added an ordered list to the unordered list". If you use the graphical way, you can now see easily what has changed on the file directly in the editor by clicking it.

Conclusion
In this lesson, we have started to become familiar with our coding environment, as well as getting our changes backed up regularly. In addition, we started to explore the structure of a web page, and now have the ability to make changes and see them right away. Full code to this point may be found at GitHub, or StackBlitz.
Next - An Introduction to Displaying Web Pages
Prior - Helpful tools for the Introduction to Practical Programming
Tags: Practical Programming, Introduction, HTML, Git, CSS, Web Page, JavaScript